It's the quickest setup ever. Zsight app is designed to scan the QR code as ID of network video recorder or IP cameras. Just follow the steps in the manual to set up in your iPhone or Android smartphone, you can instantly view the live footage streaming from your IP cameras.


Download the latest versions of Zsight for your Smartphone with the links below.


The process for iPhone or Android is the same. The below video will show you how to operate the Zsight on the smartphone.
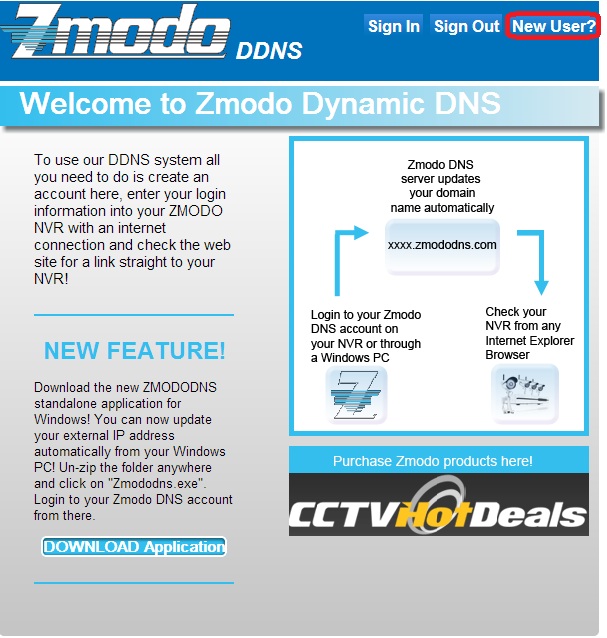
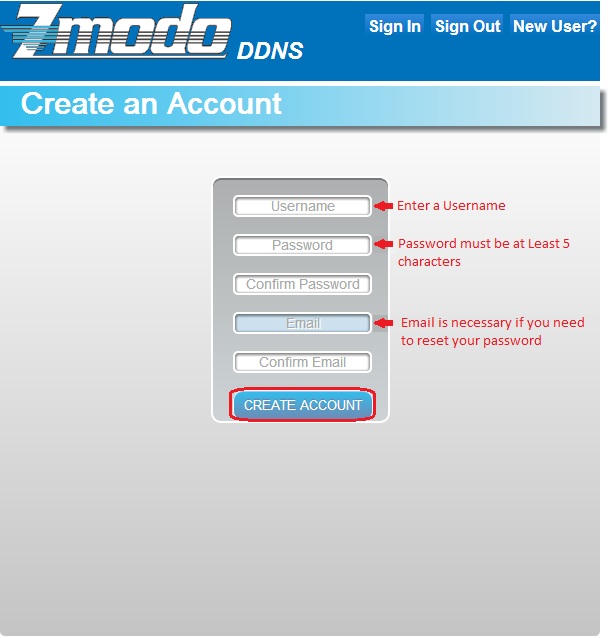
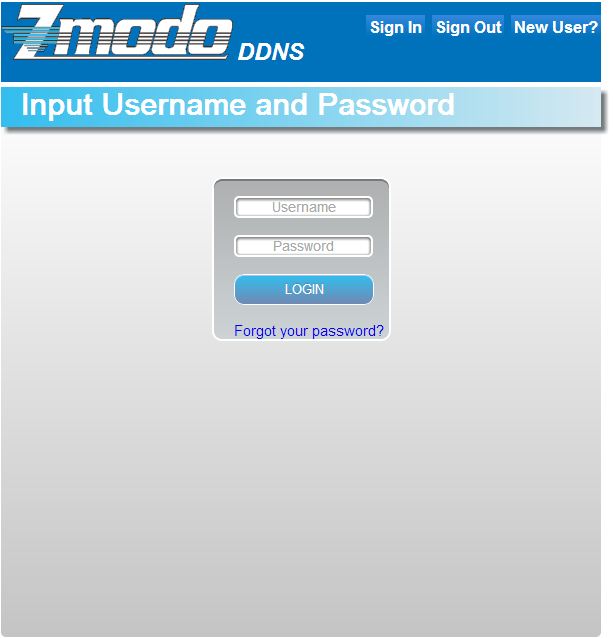
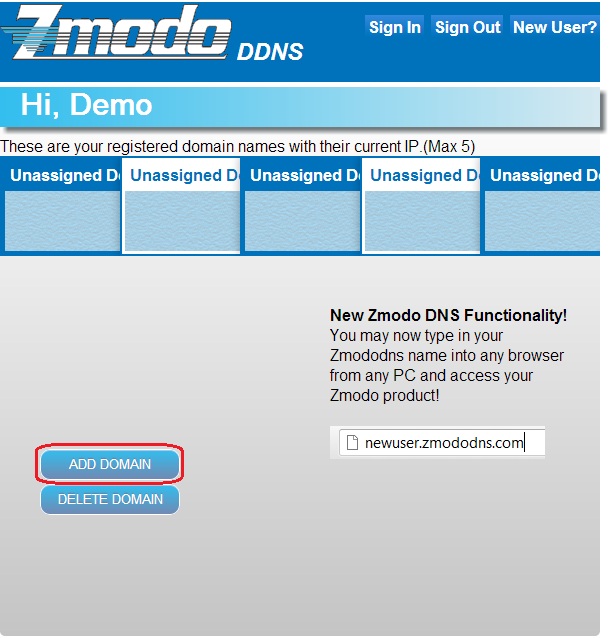
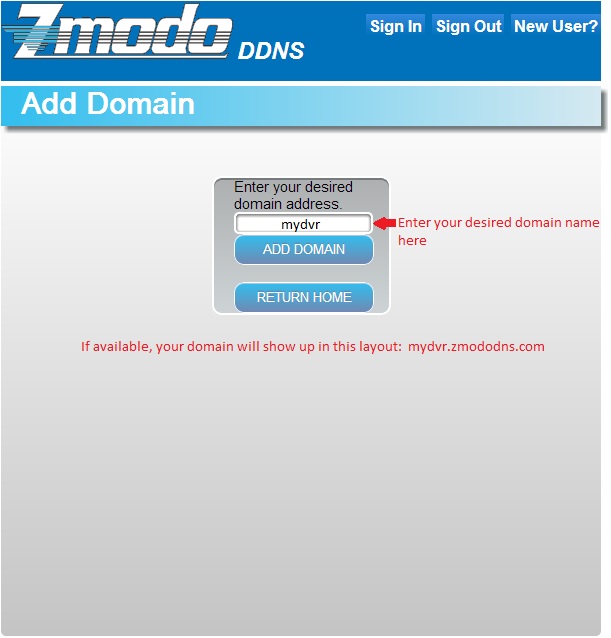
STEP1 Create a Free ZMODO DNS Account for Use with ZMODO IP Cameras
STEP2 Configure the IP Camera to use zmododns
- Connect the IP Camera to the router use the included network cable. Run IP Search on your PC, and get
the current IP address of your IP Camera.

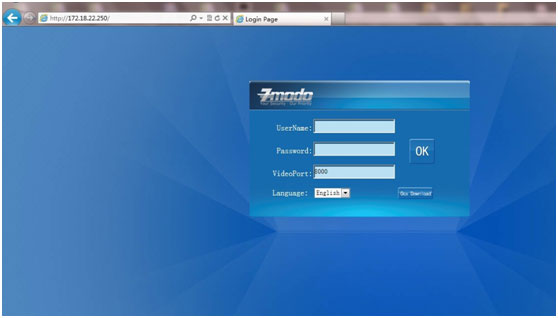
- Open your IE Browser, and input the IP Camera’s IP address you get from IP Search.
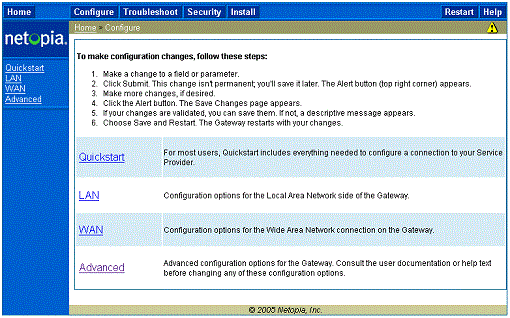
- In the IP Camera, navigate to “Remote Configuration”, then click on the “DDNS”.
Choose “zmododdns” from the server drop down menu.
Enter the newly registered domain name into the domain field. Be sure the “DDNS” is checked on. Click “Submit” to Save the settings.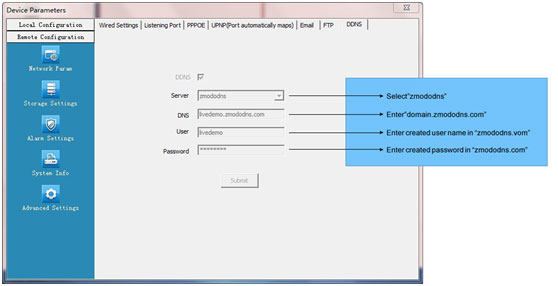
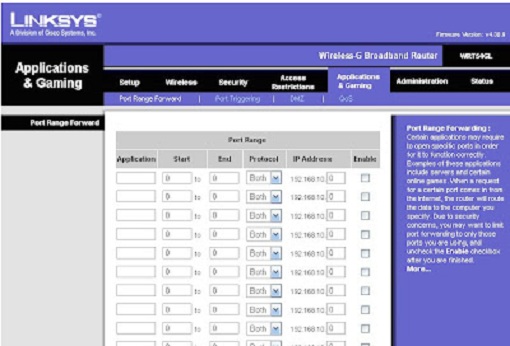
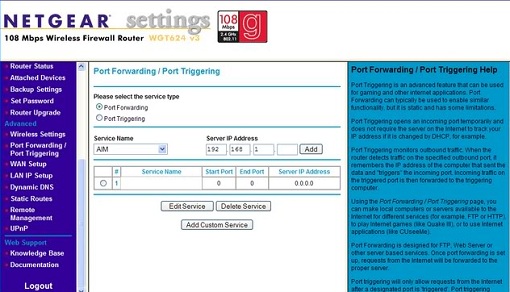
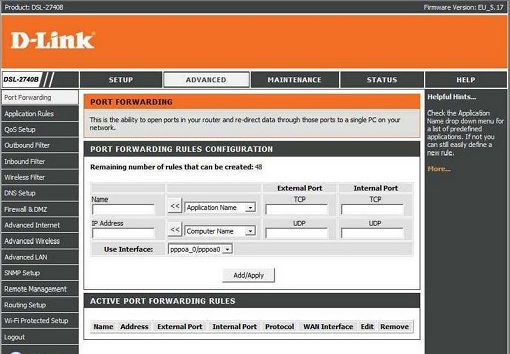
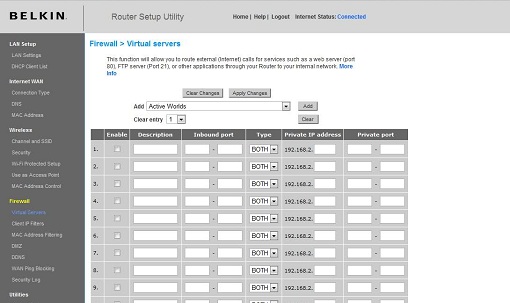
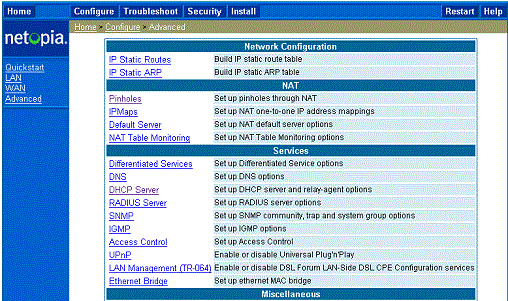
STEP3 Port Forwarding for IP Cameras
IP Address = IP address in your Camera's Network SettingsProtocol = BOTH (TCP/UDP) OR TCPService or Application Name can be anything you wish, like Camera1 or Camera2Create 1 rule per port number; Start and End Ports will be the same number
IP Camera: 80, 8000, 9000Note: If you are using a DSL internet service, you may need to use port 81 (instead of 80) as your web port. If so, be sure to change this in your DVR's network settings, and restart the unit. Once the port number is changed, you will need to use it when connecting to the unit (ie. http://192.168.1.1 becomes http://192.168.1.140:81)


STEP4 Access IP Camera Footage
Zviewer for Android User Manual
System Requirements: Android™ 2.2 and Newer
- Download Zviewer software from Google Play and install to phone.
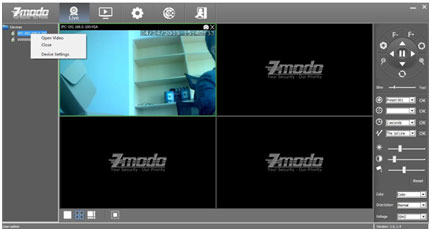
- Tap the icon from the home screen or app drawer to open Zviewer. This will take you to the main interface:
- Tap on any channel’s play window, an orange border will surround the chosen channel, then click [
 ] to play/ [
 ] to stop the
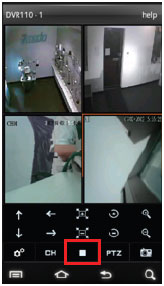
- Click [
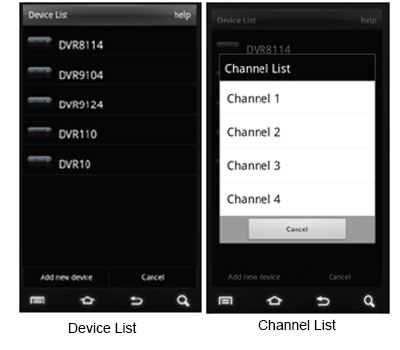
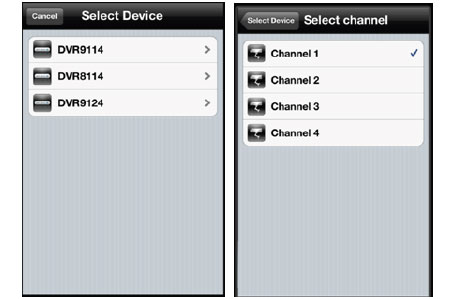
 ]. This will take you to the "Device List" window. Tap the desired device, which will take you to the "Channel List" window. Tap the desired channel and the app will automatically return to the main interface and begin playing video from the channel requested. Repeat steps 4 and 5 for any remaining empty playback windows.
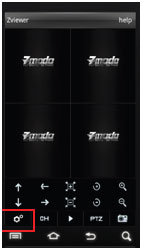
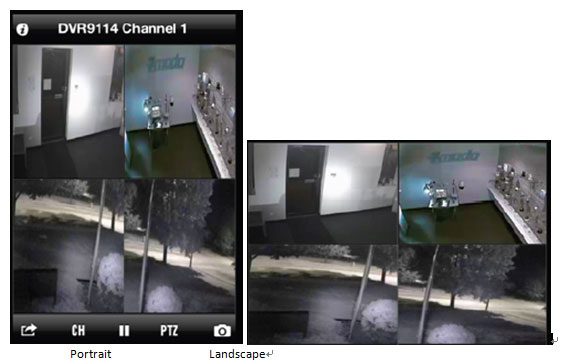
- Double tap the video window to switch between single channel and four channel views. Switch between Portrait and Landscape views by turning your phone horizontally or vertically (See Portrait, Landscape):

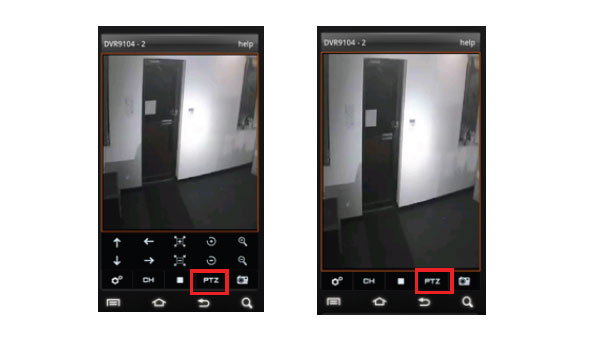
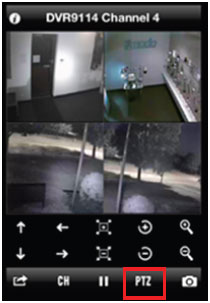
- Double tap on the channel you would like to control to maximize the screen; click [
 ] to use PTZ functions (Note: PTZ only available for designated products).
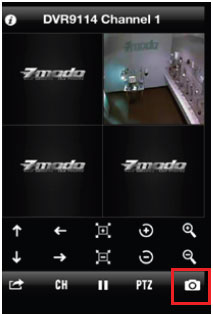
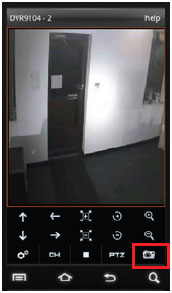
- In portrait mode, select a video, and click [
 ] to save a screenshot to the SD card/camerastation directory.
Zviewer For iOS User Manual (System Requirements: iOS4.3 and Newer)
- Download Zviewer software from Apple store and install to phone.
- Tap the icon from the home screen to open Zviewer. This will take you to the main interface:

-
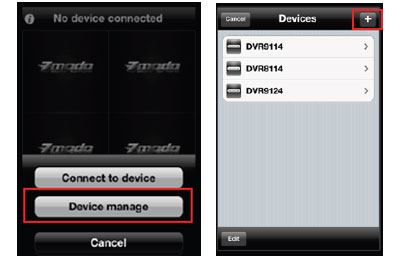
Click [Setting]. If no devices are configured, you will be prompted with "No device connected". Select [Device mange], which will take you to the "Devices" section:
-
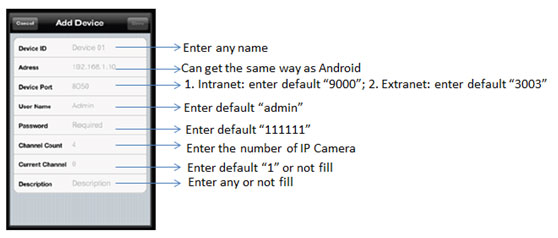
Click [
 ] to add a device. Enter the device information, then click [Save].
-
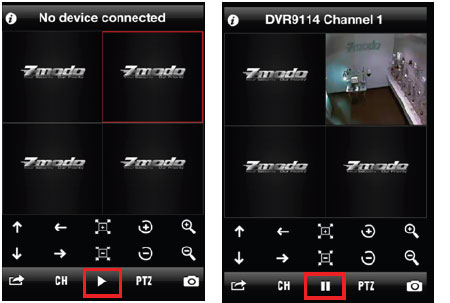
Tap on any channel’s play window, an orange border will surround the chosen channel, then click [ ] to play/ [
 ] to stop the video:
-
Click [Setting]. This will take you to the "Device List" window. Tap the desired device, which will take you to the "Channel List" window. Tap the desired channel and the app will automatically return to the main interface and begin playing video from the channel requested. Repeat steps 5 and 6 for any remaining empty playback windows.
-
Double tap the video window to switch between single channel and four channel views. Switch between Portrait and Landscape views by turning your phone horizontally or vertically (See Portrait, Landscape):
-
Click [ ] to use PTZ functions (Note: PTZ only available for designated products).
-
In portrait mode, select a video, and click [ ] to save a screenshot to the IPhone’s ‘Photos’ app.